How to Build a Survival Shelter in the Wilderness That Keeps You Safe
How to build a survival shelter in the wilderness? Learn key techniques to stay warm, dry, and safe using natural materials and smart construction methods.

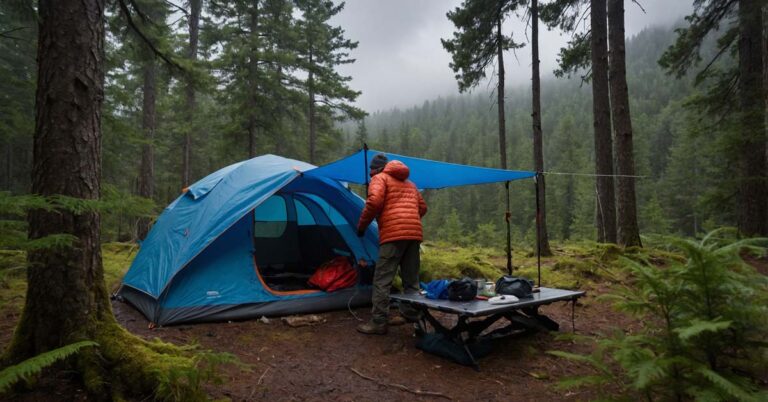
When you’re out in the wilderness, knowing how to build a survival shelter can mean the difference between life and death. Whether you’re an experienced camper or a beginner, understanding the basics of constructing a shelter is a critical skill. In this article, I’ll walk you through everything you need to know about building a survival shelter in the wilderness. From choosing the right location to selecting materials and constructing different types of shelters, this guide is designed to be practical, straightforward, and easy to follow.
Contents Include
- 1 Why Building a Survival Shelter is Essential
- 2 How to Build a Wilderness Survival Shelter That Keeps You Safe
- 3 Additional Tips for Building a Survival Shelter
- 4 Final Thoughts
Why Building a Survival Shelter is Essential
Before we get into the how-to, let’s talk about why building a survival shelter is so important. In the wilderness, exposure to the elements—rain, wind, snow, or extreme heat—can quickly lead to hypothermia, dehydration, or heatstroke. A well-built shelter protects you from these dangers, helps regulate your body temperature, and provides a safe space to rest and recover. It’s not just about comfort; it’s about survival.
How to Build a Wilderness Survival Shelter That Keeps You Safe
Step 1: Assess Your Situation
The first step in building a survival shelter is to assess your situation. Ask yourself these questions:
- What is the weather like? Is it raining, snowing, or sunny? This will determine the type of shelter you need.
- How much time do you have? If it’s getting dark or a storm is approaching, you’ll need to work quickly.
- What resources are available? Look around for natural materials like branches, leaves, and rocks.
- How many people are with you? The size of your shelter will depend on the number of people who need protection.

Understanding your environment and needs will help you make the best decisions moving forward.
Step 2: Choose the Right Location
Location is everything when it comes to building a survival shelter. Here’s what to look for:
- Flat Ground: Avoid slopes or uneven terrain. A flat surface will make it easier to build and sleep in your shelter.
- Proximity to Resources: Choose a spot near water sources, but not too close. You don’t want to risk flooding or attracting wildlife.
- Natural Protection: Look for areas with natural windbreaks, like large trees or rock formations.
- Safety: Avoid areas with dead trees, loose rocks, or signs of animal activity.
Once you’ve found the perfect spot, clear the area of debris, rocks, and sharp objects to create a safe and comfortable space.
Step 3: Gather Materials
The materials you’ll need depend on the type of shelter you plan to build. Here are some common materials you can find in the wilderness:
- Sticks and Branches: These are essential for creating the frame of your shelter.
- Leaves and Grass: Use these for insulation and waterproofing.
- Rocks: These can be used to anchor your shelter or create a fire pit.
- Vines or Cordage: If you have rope or paracord, great. If not, vines or long grasses can be used to tie materials together.

Gather more materials than you think you’ll need. It’s better to have extra than to run out halfway through construction.

Step 4: Decide on the Type of Shelter
There are several types of survival shelters you can build, depending on your situation and available resources. Here are three of the most common:
1. Lean-To Shelter
A lean-to shelter is one of the simplest and quickest shelters to build. Here’s how to do it:
- Find a Long Branch: This will serve as the main support beam.
- Prop It Up: Lean the branch against a tree or large rock at a 45-degree angle.
- Add Smaller Branches: Place smaller branches along the length of the main branch to create a frame.
- Cover the Frame: Layer leaves, grass, or pine needles over the frame to create insulation and waterproofing.

A lean-to shelter is great for quick protection from rain or wind, but it’s not the most insulated option.
2. A-Frame Shelter
An A-frame shelter provides better insulation and protection than a lean-to. Here’s how to build one:
- Create a Ridgepole: Find a long, sturdy branch and place it horizontally between two trees or supports.
- Build the Frame: Lean smaller branches against both sides of the ridgepole to create an A-shape.
- Cover the Frame: Layer leaves, grass, or other materials over the frame for insulation and waterproofing.
- Add a Door: Leave one end open for entry, and cover it with a pile of leaves or branches when you’re inside.
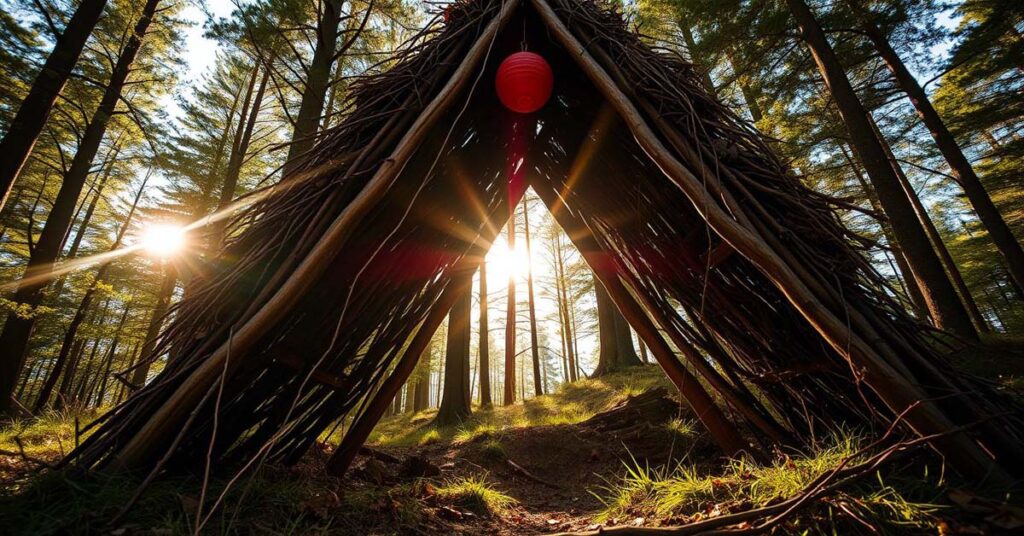
An A-frame shelter is more time-consuming to build but offers better protection from the elements.
3. Debris Hut
A debris hut is one of the most insulated shelters you can build. It’s ideal for cold weather or overnight stays. Here’s how to construct one:
- Create a Framework: Start with a long, sturdy branch as the spine. Prop one end up on a tree or rock, and let the other end rest on the ground.
- Add Ribs: Place smaller branches along both sides of the spine to create a ribbed structure.
- Cover with Debris: Layer leaves, grass, and other debris over the frame until it’s at least 2-3 feet thick.
- Create an Entrance: Leave a small opening at one end, and cover it with debris when you’re inside.

A debris hut takes more time and effort to build, but it’s incredibly effective at retaining heat.
Step 5: Insulate and Waterproof Your Shelter
No matter which type of shelter you build, insulation and waterproofing are key. Here’s how to do it:
- Layer Thickly: Use as many leaves, grass, or pine needles as possible to create a thick barrier against the cold and rain.
- Use Bark or Logs: If available, place bark or logs over the top layer of debris for added protection.
- Create a Ground Insulator: Place a thick layer of leaves or grass inside the shelter to keep you off the cold ground.

Step 6: Test Your Shelter
Before you settle in for the night, test your shelter to make sure it’s secure and comfortable. Check for any gaps or weak spots, and reinforce them if necessary. Make sure the entrance is easy to access but can be closed off to keep out wind, rain, or animals.
Step 7: Maintain Your Shelter
Once your shelter is built, it’s important to maintain it. Check for damage after storms or heavy winds, and make repairs as needed. Keep the area around your shelter clean to avoid attracting wildlife.
Additional Tips for Building a Survival Shelter
- Use What’s Available: Don’t waste energy searching for the perfect materials. Use what’s around you.
- Keep It Small: A smaller shelter is easier to heat and takes less time to build.
- Stay Dry: If possible, build your shelter on elevated ground to avoid flooding.
- Practice Makes Perfect: If you’re new to building shelters, practice in your backyard or a local park before heading into the wilderness.
Final Thoughts
Knowing how to build a survival shelter in the wilderness is a skill that every camper, hiker, and outdoor enthusiast should have. It’s not just about staying comfortable; it’s about staying alive. By following the steps outlined in this guide, you’ll be well-prepared to handle whatever nature throws your way.
Remember, the key to survival is staying calm, thinking clearly, and using the resources around you. With a little practice and preparation, you’ll be able to build a shelter that keeps you safe and warm, no matter where your adventures take you.
If you found this guide helpful, feel free to share it with your fellow campers. And don’t forget to subscribe my blog, OutdoorTrekz.com, for more tips and tricks on camping and wilderness survival. Happy camping!