How to Build a Bushcraft Shelter: A Guide for Survival and Comfort
Learn how to build a bushcraft shelter step by step for survival and comfort in the wild. Essential tips, tools, and techniques for campers and adventurers.

When you’re out in the wild, knowing how to build a bushcraft shelter can mean the difference between a comfortable night under the stars and a miserable, unsafe experience. As someone who’s spent countless nights in the wilderness, I can tell you that building a shelter is one of the most essential skills for any camper or survivalist. In this guide, I’ll walk you through the process step by step, so you can confidently create a sturdy, weather-resistant shelter using natural materials.

Contents Include
Why Building a Bushcraft Shelter is Important
Before we dive into the steps, let’s talk about why this skill matters. A bushcraft shelter:
- Protects you from harsh weather conditions like rain, wind, and extreme temperatures.
- Provides a safe space to rest and recover, which is critical for survival.
- Boosts your confidence and self-reliance in the wilderness.
Whether you’re planning a camping trip or preparing for survival scenarios, learning this skill is a must. Also learn about bushcraft camping and how to get start.
What You’ll Need to Build a Bushcraft Shelter
You don’t need fancy tools or equipment to build a bushcraft shelter. Here’s what you should have:
- A sturdy knife or multi-tool (for cutting and shaping materials).
- Paracord or natural cordage (like vines or bark).
- A tarp or emergency blanket (optional, but helpful for added protection).
- Knowledge of your environment (look for natural resources like fallen branches, leaves, and rocks).
Types of Bushcraft Shelters
There are several types of shelters you can build depending on your environment, available materials, and time. Here are the most common ones:
Lean-To Shelter
A lean-to is one of the simplest and quickest shelters to build. It’s ideal for mild weather and provides basic protection from wind and rain.
A-Frame Shelter
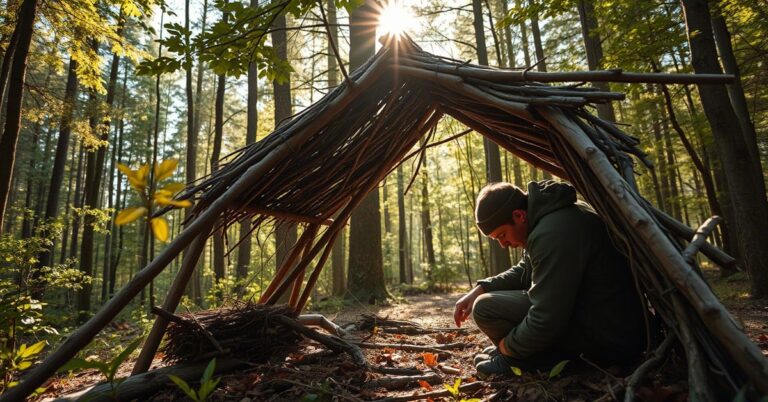
Also known as a debris hut, this shelter offers better insulation and protection. It’s perfect for colder climates or when you need more coverage.
Wickiup Shelter
This dome-shaped structure uses sticks and leaves to create a cozy, insulated space. It’s great for long-term stays or when you have more time to build.
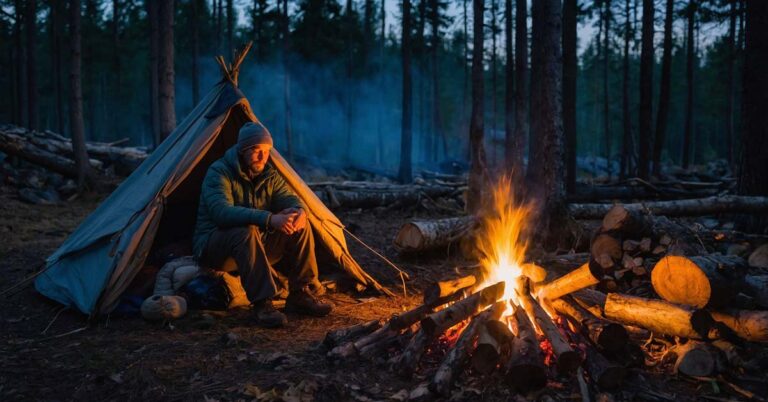
Tarp Shelter
If you’re carrying a tarp, you can quickly set up a shelter using natural supports like trees or branches. It’s lightweight and efficient for backpackers.
Steps to Build a Bushcraft Shelter
Let’s start with the lean-to since it’s the easiest and most versatile option for beginners. Follow these steps to build your own:
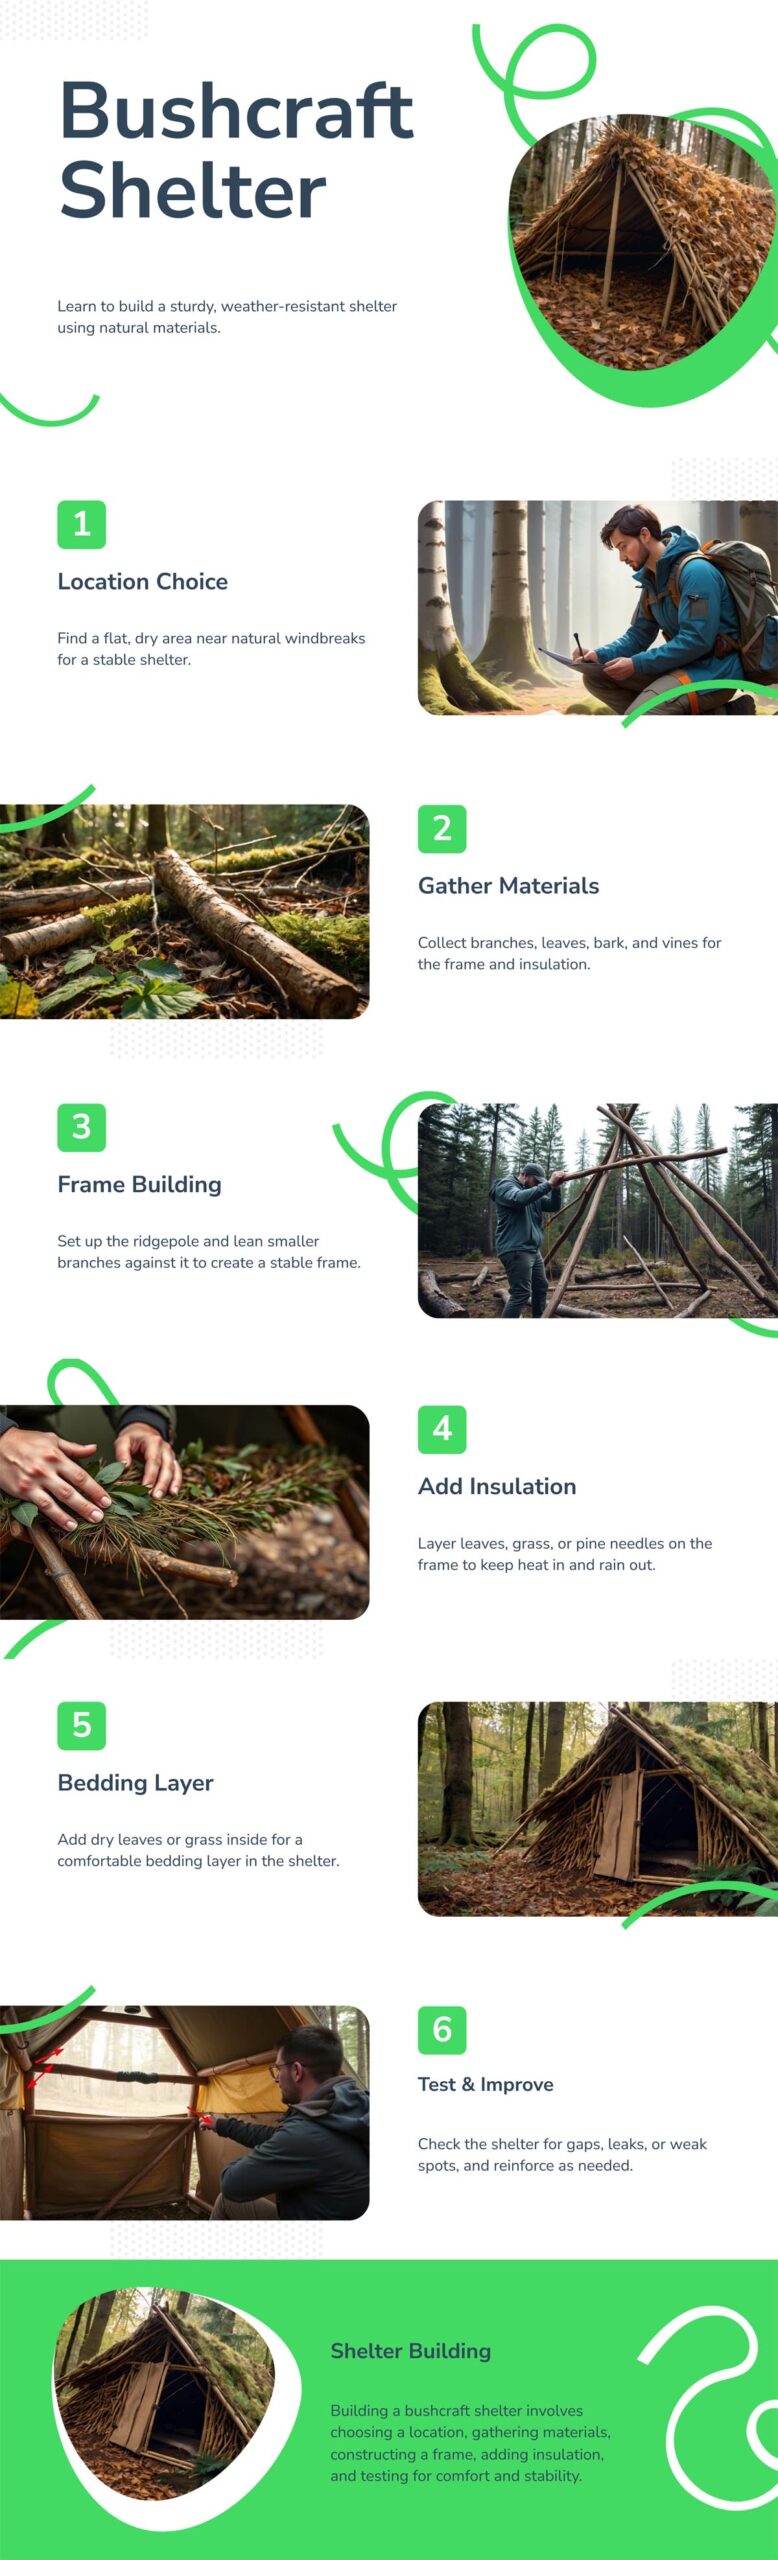
1. Choose the Right Location
The first step in building a bushcraft shelter is selecting the right spot. Here’s what to look for:
- Flat Ground: Avoid slopes or uneven terrain to ensure comfort and stability.
- Natural Windbreaks: Look for areas near large trees, rocks, or hills that can shield you from wind.
- Dry Ground: Stay away from low-lying areas that could flood during rain.
- Proximity to Resources: Make sure you’re close to materials like branches, leaves, and water (but not too close to avoid insects or rising water levels).
2. Decide on the Type of Shelter
There are several types of bushcraft shelters, but for beginners, I recommend starting with a lean-to shelter. It’s simple, effective, and requires minimal materials. Here’s how to build one:
2.1. Gather Your Materials
You’ll need:
- Ridgepole: A long, sturdy branch (about 7-10 feet long) to serve as the main support.
- Support Stakes: Two Y-shaped branches to hold the ridgepole.
- Ribs: Smaller branches to create the frame of the shelter.
- Insulation: Leaves, grass, pine needles, or bark to cover the frame and provide insulation.

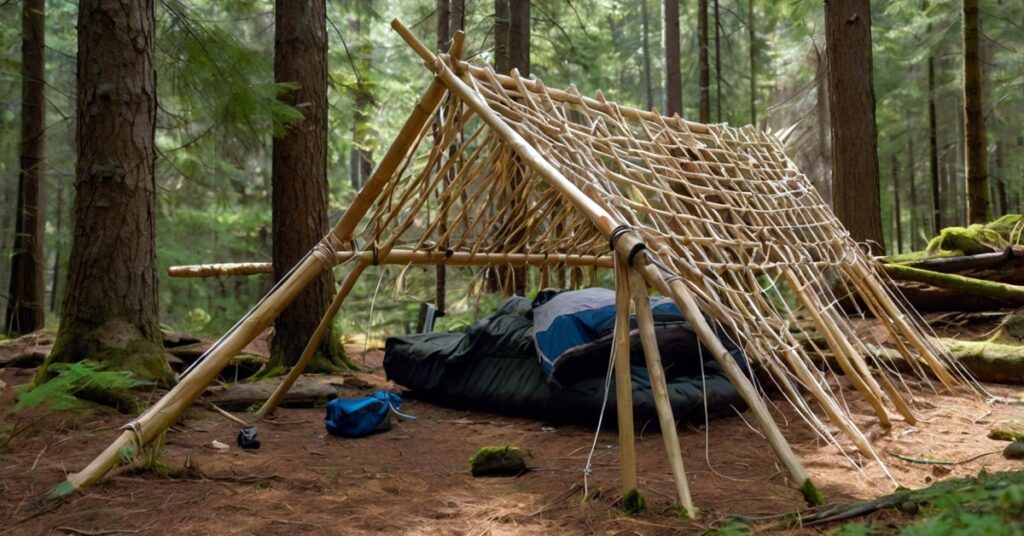
2.2. Build the Frame
- Set Up the Ridgepole: Place the ridgepole horizontally between two trees or support stakes. Make sure it’s secure and at a comfortable height (about 3-4 feet off the ground).
- Add the Ribs: Lean smaller branches against the ridgepole at a 45-degree angle to create the frame. Space them about 6-8 inches apart.
- Secure the Frame: Use paracord or natural cordage to tie the ribs to the ridgepole for added stability.
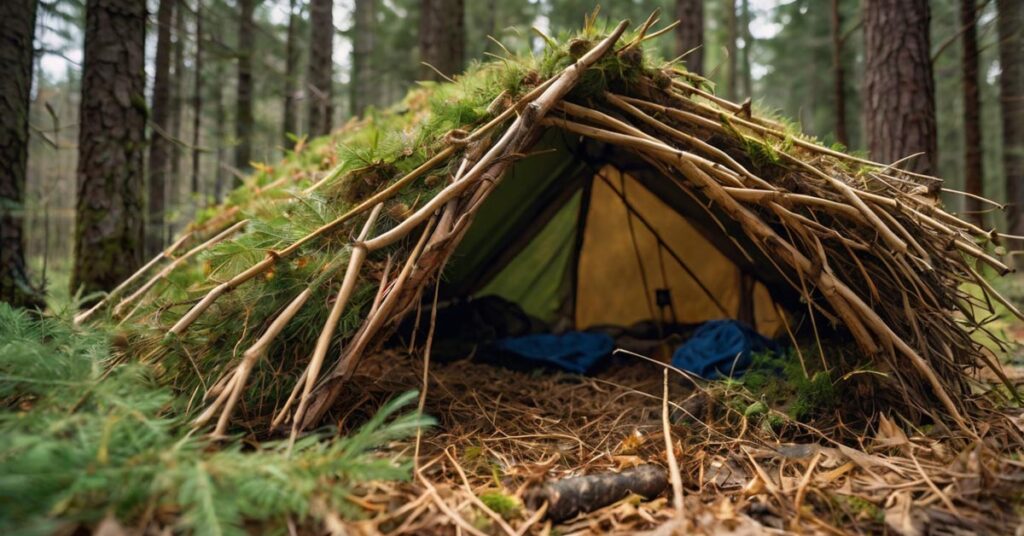
2.3. Add Insulation
- Layer the Ribs: Start covering the frame with leaves, grass, or pine needles. Begin at the bottom and work your way up, overlapping each layer like shingles to ensure water runs off.
- Thickness Matters: Aim for at least 12-18 inches of insulation to keep warmth in and rain out.
- Test for Leaks: Once the shelter is complete, check for gaps and add more insulation as needed.
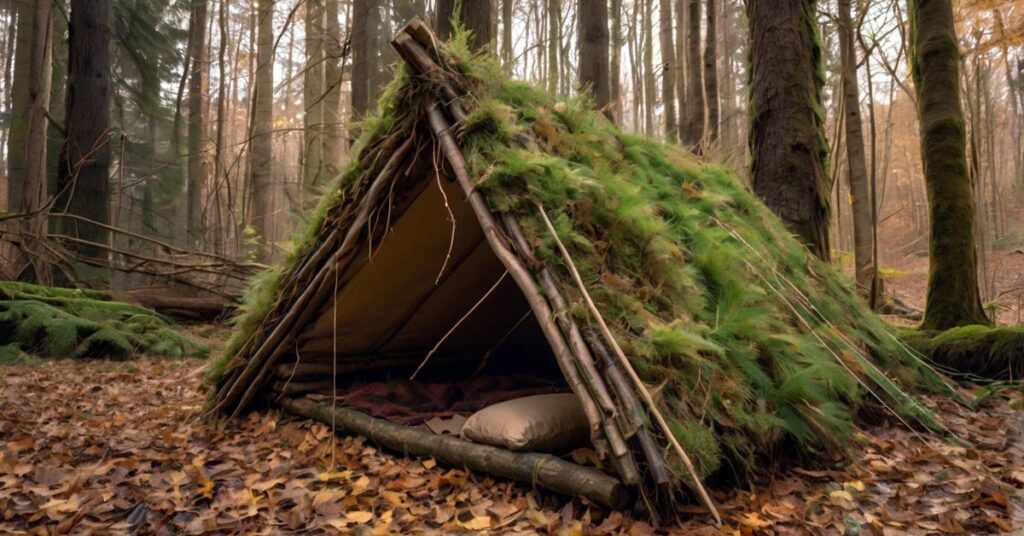
2.4. Create a Bedding Layer
Sleeping directly on the ground can drain your body heat. To stay warm and comfortable:
- Gather dry leaves, grass, or pine needles to create a thick bedding layer inside the shelter.
- Add a tarp or emergency blanket for extra insulation if you have one.
3. Test and Improve Your Shelter
Before settling in, test your shelter for stability and comfort. Make adjustments as needed, such as adding more insulation or reinforcing the frame. Remember, a good shelter should protect you from the elements and feel secure.
Tips for Building a Bushcraft Shelter
- Work with Nature: Use natural features like fallen trees or rock formations to save time and effort.
- Keep It Small: A smaller shelter is easier to heat and requires fewer materials.
- Stay Dry: Always prioritize staying dry by choosing the right location and using proper insulation.
- Practice Makes Perfect: The more you practice building shelters, the faster and more efficient you’ll become.
Common Mistakes to Avoid
Even experienced campers make mistakes when building shelters. Here’s what to watch out for:
- Choosing a poor location (e.g., damp ground or exposed areas).
- Using weak or green wood that won’t hold up.
- Skipping insulation, which is crucial for staying warm.
- Overcomplicating the design—keep it simple and functional.
Final Thoughts
Building a bushcraft shelter is a rewarding skill that connects you with nature and prepares you for any outdoor adventure. By following these steps, you’ll be able to create a reliable shelter that keeps you safe and comfortable in the wild. Remember, the key to success is preparation, practice, and using the resources around you.